Next.js allows you to build React applications. Recently, it gained a lot of popularity because of the great developer experience and many other features that make it a joy to use.
In this article, we will build a state-of-the-art web application with Next.js Edge and Upstash Redis. With the recent developments in Edge computing, we will use the newest features from Next.js (Edge SSR and Edge API Routes) to build an application that is blazing fast, fully distributed and scalable. And, the good news is that it's 100% serverless with no server management.
To illustrate the power of edge computing, we will create a simple URL shortener application. A URL shortener is a service that takes a URL and converts it into a shorter URL. This is useful when you want to share a URL on Twitter or other social media platforms. It's also useful when you want to hide the actual URL from the user.
Edge Computing
In the past, Static Site Generation (SSG) in Next.js was served from the edge with the help of CDN. The static HTML content is deployed around the world and the user gets the content from the nearest edge location. It is a great way to reduce the latency and improve the performance of the application.

For dynamic content, Next.js provides Server Side Rendering (SSR). The content is generated on the server and sent to the client. In the past, compared to SSG, SSR was only deployed in a single location for an easy setup.
With the latest version of Next.js (Next.js 12.2), we have access to the Edge Rendering. The feature is still in experimental mode, but you can already try it out. This allows to deploy SSR and API routes at the edge. So, the dynamic content can now be served from multiple locations in one configuration.
After moving to the edge, there is a bottleneck with the database. Due to the complexity and operational cost, it was hard to deploy the database in multiple locations. But, with recent and modern database providers like Upstash, we can now deploy a global Redis database in one click. The perfect match for the Edge Rendering/Computing. On top of that, Upstash is a serverless database, so you don't have to worry about the infrastructure.
Edge Server-Rendering
We'll use Next.js Boilerplate as a starting point. It's a great way to start with Next.js with TypeScript and Tailwind CSS. It's also configured with ESLint, Prettier, Husky, Jest and Cypress. You can find the source code on GitHub at Next.js Boilerplate.
First, let's create a new admin folder with a new Page named src/pages/admin/index.tsx:
import type { InferGetServerSidePropsType } from 'next';

const Index = (
  props: InferGetServerSidePropsType<typeof getServerSideProps>
) => <div>{props.runtime}</div>;

export const getServerSideProps = async () => {
  const runtime = process.env.NEXT_RUNTIME || '';

  return {
    props: { runtime },
  };
};

export const config = {
  runtime: 'experimental-edge',
};

export default Index;
The runtime configuration can be set on all pages when you want to deploy at the edge. By default, the runtime is set to nodejs. But, for Edge Rendering, we need to set it to experimental-edge.
After deploying the application, you can see that the page is rendered at the edge. You can check it out by opening the page in the browser and the server should return edge.
Edge API routes
You aren't limited to the rendering, you can also deploy your API routes at the edge. Let's create a new API route src/pages/api/create-redirection.ts:
export default function handler() {
  const runtime = process.env.NEXT_RUNTIME || '';

  return new Response(
    JSON.stringify({
      runtime,
    }),
    {
      status: 200,
      headers: {
        'content-type': 'application/json',
      },
    }
  );
}

export const config = {
  runtime: 'experimental-edge',
};
Same as the edge rendering, we need to set the runtime configuration to experimental-edge.
You can use your browser or your favorite HTTP client to test the API route. It should return {"runtime":"edge"}.
Enable Edge globally
Instead of setting the runtime configuration on each Next.js pages (it doesn't work for API routes), you can enable it globally. To do so, you need to create a new file next.config.js at the root of the project:
module.exports = {
  experimental: {
    runtime: 'experimental-edge',
  },
};
Serverless and Distributed Global Database
After making sure that the application is deployed at the edge, we can now focus on the database part. We will use Upstash Redis, a serverless Redis database provider.
We'll use the free plan for this article. First, we need to create an account on Upstash. Then, create a new global Redis database:
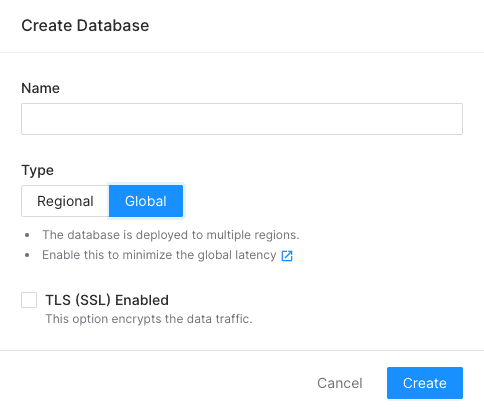
Don't forget to select Global in the Type section.
Connect to the Redis database
We will use the @upstash/redisdis package to connect to the Upstash Redis database. You can install it with the following command:
npm install @upstash/redisThen, create a new file src/utils/redis.ts :
import { Redis } from '@upstash/redis';

export const redis = new Redis({
  url: process.env.UPSTASH_REDIS_REST_URL || '',
  token: process.env.UPSTASH_REDIS_REST_TOKEN || '',
});
On your Upstash dashboard, you can copy the UPSTASH_REDIS_REST_URL value. Then, you can paste into in the .env file:
UPSTASH_REDIS_REST_URL=https://XXXXXXXX.upstash.ioYou also need to copy the UPSTASH_REDIS_REST_TOKEN value. This time, you need to paste it in the .env.local file:
UPSTASH_REDIS_REST_TOKEN=XXXXXXXXSince we are using the .env.local file, it won't be committed to the Git repository. It's a good practice to store the secret values in this file.
You also need to add UPSTASH_REDIS_REST_TOKEN in your Vercel dashboard. Go to Settings > Environment Variables and define the UPSTASH_REDIS_REST_TOKEN variable.
Add data to the database
Before adding data to the database, we need to define the data structure by creating a new file src/types/redirection.ts:
export type IRedirection = {
  id: string;
  url: string;
};
We will use the API route we created earlier to add data to the database. Let's update the src/pages/api/create-redirection.ts file:
import type { NextRequest } from 'next/server';

import type { IRedirection } from '@/types/redirection';
import { redis } from '@/utils/Database';

export default async function handler(req: NextRequest) {
  const reqJson: IRedirection = await req.json();

  await redis.hset('short', {
    [reqJson.id]: reqJson.url,
  });

  return new Response(
    JSON.stringify({
      success: true,
    }),
    {
      status: 200,
      headers: {
        'content-type': 'application/json',
      },
    }
  );
}

export const config = {
  runtime: 'experimental-edge',
};
We use the hset Redis method to add data to the database.
After deploying, you can test the API route by sending a POST request with the following body:
{
  "id": "magic",
  "url": "https://google.com"
}
By sending this request, it'll add a new entry to the database. Then, the idea is to redirect the user to the Google website when the user enters the magic as an ID.
Redirection on Edge with Middleware
A middleware in Next.js allows you to run a function before completing a request. By default, all middlewares are executed at the edge. So, you don't need to set any configuration.
We'll add the redirection logic in Next.js middleware. Let's create a new file named src/middlewares.ts:
import type { NextRequest } from 'next/server';
import { NextResponse } from 'next/server';

import { redis } from './utils/Database';

export const middleware = async (req: NextRequest) => {
  const id = req.nextUrl.pathname.replace('/r/', '').replace(/\/$/, '');
  const url = await redis.hget('short', id);

  if (typeof url === 'string') {
    return NextResponse.redirect(url);
  }

  return NextResponse.redirect(new URL('/', req.url));
};

export const config = {
  matcher: '/r/:path*',
};
At the bottom of the file, we use the config object to define the matcher configuration. So, the middleware will be executed only when the pathname starts with /r/.
We use the hget Redis method to get the URL from the database. If the entry exists, it redirects the user to the URL. Otherwise, it redirects to the homepage.
List all redirections
We will use the index page in the admin folder we created earlier to list all redirections stored in the database. Let's update the src/pages/admin/index.tsx file:
import type { GetServerSideProps, InferGetServerSidePropsType } from 'next';

import { redis } from '@/utils/Database';

const Index = (
  props: InferGetServerSidePropsType<typeof getServerSideProps>
) => (
  <div className="max-w-md">
    {Object.entries(props.list).map(([key, value]) => (
      <div key={key}>
        {key} - {value}
      </div>
    ))}
  </div>
);

export const getServerSideProps: GetServerSideProps<{
  list: Record<string, string>;
}> = async () => {
  const list: Record<string, string> = (await redis.hgetall('short')) ?? {};

  return {
    props: { list },
  };
};

export default Index;
We also use the getServerSideProps function to get the data on the server-side with SSR. And, we have already set the runtime configuration in the next.config.js file. So, the page will be rendered at the edge for each request.
For the database, we are using the hgetall Redis method to get all entries. Then, we are displaying the list on the Next.js page.
Conclusion
After following this tutorial, you should be able to deploy the URL shortener on production with Vercel and Upstash. And, the good thing everything is at the edge: API routes, middleware and rendering are happening at the edge. Not only do we use edge computing, but we also use a globally distributed database with Upstash. So, everything is close to the user and fast.

All the infrastructure is 100% serverless and you don't need to worry about server management and scaling. You can focus on the business logic and the user experience.